Thursday 30 January 2014

Fresh Jugs from Paul Jessop

 As a part of my New Year, New Start
I promised myself I will make more jugs.
This morning I opened the kiln on my first batch.
These are 3lbs of clay and are approx 8" tall.

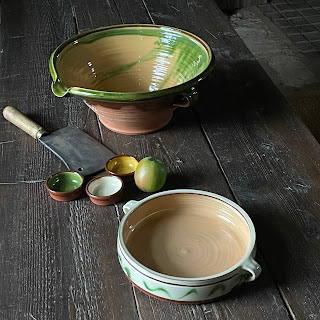
 Here on the central table in our showroom is part of our range of pots
I've put all the green pots together but I think a mix of colours 
would probably work better. 
We use a tag line at our shows
"Simple Honest Pottery"
Here are some of the jugs in more detail. 
 I do still love the plain and simple jugs best
and this afternoon I deployed one of my Christmas presents
a stick on tape measure.
I can never find my tape measure so this will enable me to set my calipers
to set sizes for making pie dishes and pot lids.
You can buy these really cheap from fabric shops
Janet at Barrington Patchwork has them in stock.

Tuesday 28 January 2014

Sharing my walk to work and my Turning Chuck.

 We Live and Pot in the Beautiful Village of Barrington
Here in Somerset .
In between the day's and day's of rain
I have been walking through the village to the workshop
and here are a few pictures taken on route.
The local farm shop Rowsel.
Across the road is St Mary's Church where we are due
to be Married later this year.
 Here is a nice Wisteria waiting for the weather to warm up
and look spectacular again.
This great big house has always been a favorite of mine
I love the windows and the stone.
This is water street heading down to Barrington Court
where our workshop is.
an old sign on a wall next to a pear tree.
A Lovely foot path that runs by a shallow stream
that Caddy likes to paddle in.
This is at the end of the footpath and a view over the 
cricket pitch.
It's a cold frosty morning down at the workshops.
So first things first to light the log burner and put the kettle on.

Today's task was to turn some larger jugs.
and for this I use a Chuck
This is a chuck I have had for over two years now
It's one I threw
It's just a tip I wanted to pass on.

It works a treat and has done for years now
all I do is wet the wheel head to stick it in place.
Having been given an Honorable mention
in the top pottery blogs for 2013
I felt I would pass on some more of my making tips
it's not so much the chuck idea that is new
but the fact that you can keep and use the same one
for years and years.


Wednesday 22 January 2014

Inspired by Ray Finch's Potters Wheel.

At The start of last year we
visited our friend Matt Grimmitt at Winchcombe Pottery,
Matt gave us a tour of the pottery
it was a real eye opener for us.
One of the main things that has sat in my head since then
was Ray Finch's wheel.
It has a wedging bench attached to the back of it
and it struck me that this is a great idea.
So one year on and now in the middle of re-planning
the layout of our workshop I have decided to make my own version.
So here is a step by step guide.
This is my Wheel above
and here below is a 3ft x4ft table I brought from ebay
locally for £30.
First of all Marion sanded down the top for me to get rid 
of all the varnish,
then I set about cutting it, not in half but just a bit more.
"Oh My god he's cut a decent table in half"
I hear you cry!
Do not be alarmed I have a cunning plan.
First I had to remove the on off switch which was fitted
 to the bit I want to take off,
then offer up the table to the back of the wheel
and mark the bit to be cut,
at this point I removed the shelf and cut the marked areas,
then I fixed the table to the wheel using these
angle brackets. ( I only used the two big ones )
 The finished job and a new very sturdy wedging bench.
 Part of my cunning plan was to use the other half of the table
as a draining board next to the sink,
no waste and two great jobs in one.
All part of the service from Barrington Pottery.
This year I hope to do more blogging than last year
but make sure they are of interest to potters
around the world.
Happy Potting Potters.

Monday 13 January 2014

New Showroom & Big Pugmill Bargain.

We started the New Year by 
improving our Showroom and counter.
Back in June when we moved into the barn, we had only one day
to install a counter and design our showroom.
It was Ok but time has proved that it was just a tad to small.
So we have taken down the counter
and moved it back 3 feet.
Then we raised the height to make the space behind it
more usable space for us.
We used a roll of wallpaper to decorate the front
of the counter to look like an old book case and added
some wooden planks taken from Pallets we have our clay
delivered on. just sanded and waxed.
This gives you an idea of the extra space
as this table used to be up against the counter.
Then at the end of last week I found I had won a bid on Ebay
for something I bid on on New Years Eve,
But I had forgotten I had placed a bid until
my Ebay account told me I needed to pay for one Item.
Oh Crikey! what was that I thought?
It turned out to be this Fantastic Vertical Pugmill
The Bargain of the Century at only £53.00
The details said they were not sure if it worked.
so I'm sure that's why know one bid on it.
But We got it in our car and brought it back to the workshop
and wired it up and it works a treat!
All we have to do now is re design the workshop space
again to fit it in .
But What a great start to 2014.


Harvest on the Farm TV appearance

It’s great to be back on the Blog! The most exciting thing that’s happening right now, is that I’ve been asked to appear on Channel 5’s TV s...